6 Volt Positive Ground - Everything most of us knows about cars and tractors with respect to electrical makes this system quite unique. First of all six volts: not too many battery chargers support that any more. You can't jump-start your tractor from most other vehicles which run on 12 volts without some damage to either (or both) systems in addition to potential harm to yourself from battery explosions. You can't run down to Tractor Supply and buy 6V headlights... yes: 6 volts is the odd-ball.
Second, there's the positive ground: yes - you need to connect the "+" red terminal post of your battery to the tractor chassis. I still stumble over this concept today. All other systems (6 or 12 volt) that I've ever known use the negative post "-" as electrical ground. Technically, it doesn't matter. Emotionally, it still makes me uneasy, unsure sometimes... but I'm getting used to it.
The third issue with this: voltage drops. Every connector over time gets a bit corroded and becomes resistive to current flow resulting in some amount of voltage drop (power loss). Now imagine several connectors getting rusty over time, a dinged wire you missed with some damaged internal copper wire strands, and your ground connections from instrument panel to all other tractor chassis castings increasing in resistance as gaskets dry, oil/grease build up... this is what happens.
As a result, let's say you lose a total of 2 volts. Doesn't sound like much until you realize this leaves you only FOUR volts on a 6 volt system. That's 33% power loss. On a 12 volt system, this would leave you 10 volts: the tractor will probably work just fine or at least not die so soon.
So why, then, would anyone want to keep a Ford 9N or 2N series tractor on 6 volts? I did because I like it. I enjoy seeing an original 6 volt generator churning away. I like knowing my electrical system is dialed-in well enough to start these engines with a low voltage source. It's fun telling people your tractor uses a positive ground only to then have them look at it like it's from Mars. That said: I've grown to appreciate my 6 volt positive ground tractor. My second 2N has been converted to 12 volt by the previous owner, but I'm staying with 6 volts on this one as long as I can.
NOTE: This section covers only 6 volt positive ground electrical info for Ford 9N and 2N series tractors.
Another great resource for 6 or 12 volt systems is Kevin LaRue via his awesome website:
http://www.myfordtractors.com/index.shtml
It's an interesting website and became my motivation to document my restoration efforts. Hats off to Kevin!
The Distributor.
My replacement rotor had too much varnish on the tab resulsting in no spark. See "1 & 2" images below. I sanded off the varnish finish as shown as shown in "3". A simple ohmmeter test verified the issue as shown in #4 of this multi-view image. The tab must make connection to the center wiper.
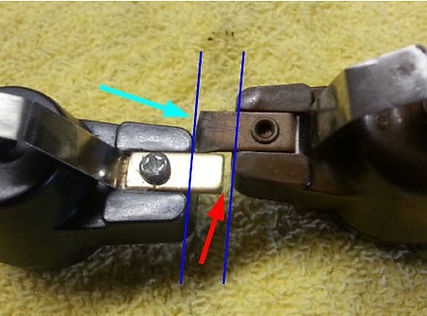
I also noticed rotor tab length is much shorter on new parts. Original rotors actually touched the brass spark plug base as shown in the comparision view to the left; note the angled wear on the old rotor tab. I thought about making a new rotor tab but came up with a different solution that seems to work quite well: extending the spark plug base with modified brass screws. The goal: not force the high-voltage spark to have to jump this 1/8" gap and lose energy.
First, I drilled an 11/64" hole in the center of each of the four spark plug bases and tapped it with 10-32 threads. The I cut the 1.5" brass bolts down to about 1.25" removing the head using a Dremel tool. Then I slotted the cut end to allow a flat screwdriver to adjust the modified brass bolt.
The slot can be seen at the blue arrow below. Adjustment is simple: manually turn the rotor past a spark plug base. Turn the brass screw in until you just make physical contact with the passing rotor tab. You'll feel a very slight "click" when it's adjusted correctly. Then add a drop of Loctite. Repeat for the other three locations. The end goal is to have very slight rotor tab contact with each of the four spark plug bases as you rotate the distributor knob.
Bad Ground=Weak Spark
After restoring the engine block, cyliner head, tranmission case, steering column, and instrument panel I induced a bad electrical connection for the ground path. In this case, the 6V positive side of the electrical world. Imagine a low-voltage signal trying to travel through all aforementioned parts which have new paint & fresh gaskets; all natural resistance to current flow. This resulted in my spark initially being red-orange (about 5kV; very weak) which only arced about 1/4" in open air.
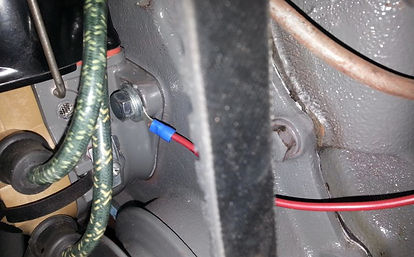
The solution was simple: run a dedicated ground wire (red for my 6V positive ground system) from the + battery connection at the instrument panel directly to key electrical assemblies. And of course, remove paint from the surface of the points of contact otherwise you're not going to see a difference.
First, I connected a red wire to the instrument panel post ensuring a good starting connection. This wire connects to the cylinder block head.
Next, from the cyliner head I ran the external ground wire to the distributor assembly. Note the mounting clamp added to the extra bolt hole in the water pump bracket. This secures the wire in place as an added precaution.
My wimpy 5kV spark increased to about 25kV. A nice white/blue color with a healthy snap that leaped about 1.5" in open air. See video insert to the left.
And while I was on the electrical ground improvement program, I went ahead and grounded the generator via the other distributor mounting bolt.


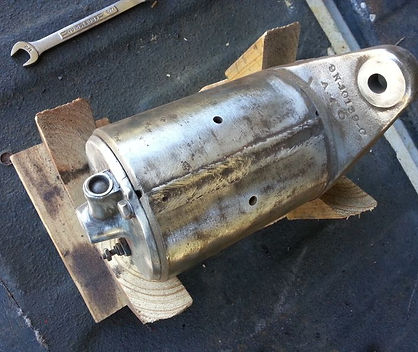
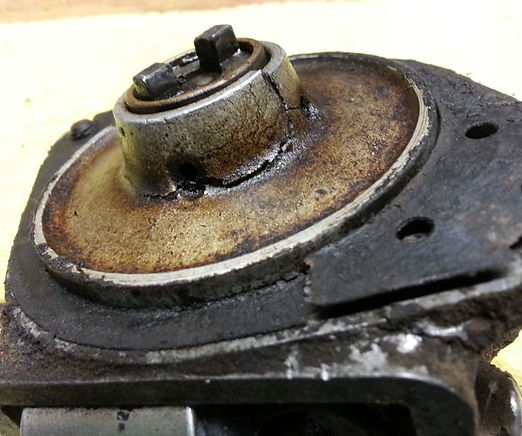
The Generator - The 6 volt systems use a generator, not an alternator. Here is a before and after picture. I used a polycarbide abrasive disc: I like them because, unlike wire-brush wheels, they do not leave small wire segments. Not what you want inside any component: especially an electrical item like a generator.
Distrbutor Mechanics - The old mount was cracked from years of stress and was replaced. The offset tabs make sure the timing is not affected by an accidental 180-degree assembly error - don't force mounting this back on the block into the timing gear.
I installed new points, condenser, etc. Here you can see a feeler gauge checking the point gap. Turn the points a few times - check gap again.


Final Assembly - After installing the distributor cap, coil, and generator; the generator belt tension can be adjusted using the threaded shaft. Then it is a matter of connecting the spark plugs and other misl wiring. I installed a new wiring harness and plug cables: take your time and double-check everything. Then it's ready for the ground-hog check: this means when you do start the tractor for the first time, do it with your back to the engine. If you see your shadow - you've got a problem! I had no electrical issues (other than the ground issue mention above) after my re-assembly.

Headlight Conversion - In addition to the rear fender light, both headlights were converted to 6 volt LED lamps. Why? Cost and longevity. Both lamps were $13 (including shipping), two sockets ($14 total), and a few dollars for mounting hardware: call it $30. That's about the price for one sealed beam lamp which, at least for me, tend to go out more often than not. The total process took about 5 hours.
Also, LED lights use VERY low power: handy when you want to leave the lights on at night outside somewhere to light up an otherwise dark and remote work area: they won't drain your battery nearly as fast as conventional sealed-beam incandescent lamps.
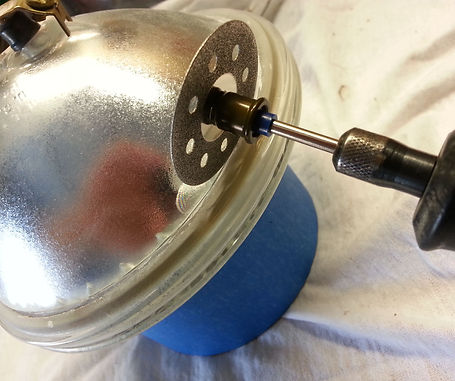
The first step was to cut the front lens away from two dead sealed beam headlights. These will become the protective cover for the LED light. Be sure to wear safety glasses/full face shield and gloves. Take your time. The Dremel EZ545 tile cutting wheel worked quite well. Again: take your time.
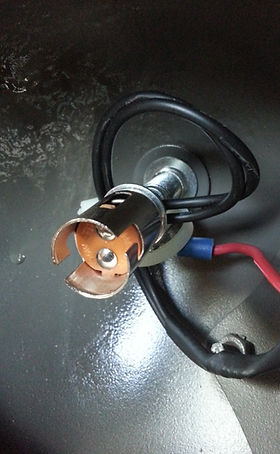
Next I drilled a hole in the back of each headlight to fit the mounting bracket/light socket assembly; see left image. The view to the right is a front view (close-up) inside the headlight housing. You can see how the LED light socket is mounted securely and wired in place.
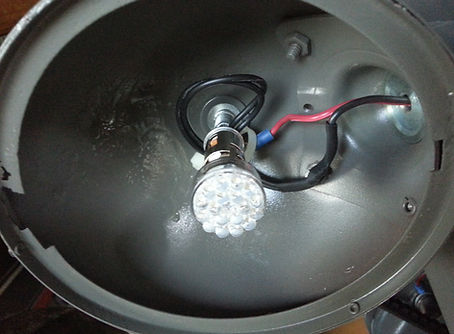
Here are the 6V LED lights; see left image. I got them off eBay: search for "6V BA15D LED White Bulb" and you'll find several to choose from. Lots of people sell 12V versions, too. Make sure you verify the base to match your light socket. The right image shows the LED in the "push-and-twist" bayonet-style socket.
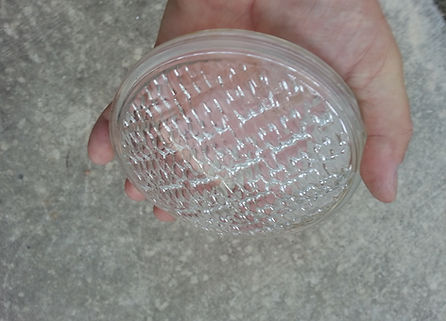
The image to the left shows me holding a finished front lens: I ran them through the dishwasher and they really came out sparkling clean. Careful: you'll have some rough edges back there. The image to the right shows one headlight assembled; the other w/o the lens cover.
I love this photo. Don't expect LEDs to look like the original sealed beam lamps: they won't. I like the bright white (~5000K) where most incandescents produce a softer/warmer tone (~3500K). I want bright lights! They are pointed down quite a bit so I won't blind an oncoming vehicle should I take it for an evening stroll around the neighborhood. Nest: get rid of those hideous front tires and crappy bumper! For now, just stare at those headlights...